![]()
Story of Elegance
Happy Tuesday Friends and Crafters!
I’m delighted that you chose to stop by!
I’ve pulled out my Translucent Florals bundle that I’ve had for quite awhile. I’ve been waiting until it is close to time that you can purchase to craft and share a couple of cards and this week is the week! This bundle will be available for purchase in our new September – December 2023 mini catalog that will be available next week on September 6th. Yay!
As a Stampin’ Up! demonstrator, I was able to purchase this set early AND at a discount. Yes! There are many benefits to being a Stampin’ Up! demonstrator. One of the many is the ability to attend special events. There was an online special event and I was able to attend and purchase this stamp set even earlier than normal. It’s like Christmas all the time with Stampin’ Up!
If you don’t have a demonstrator, and are interested in purchasing, becoming a hobby demonstrator, or starting your own Stampin’ Up! business, please contact me. I’m a happy to share more.
Here’s the card I created:
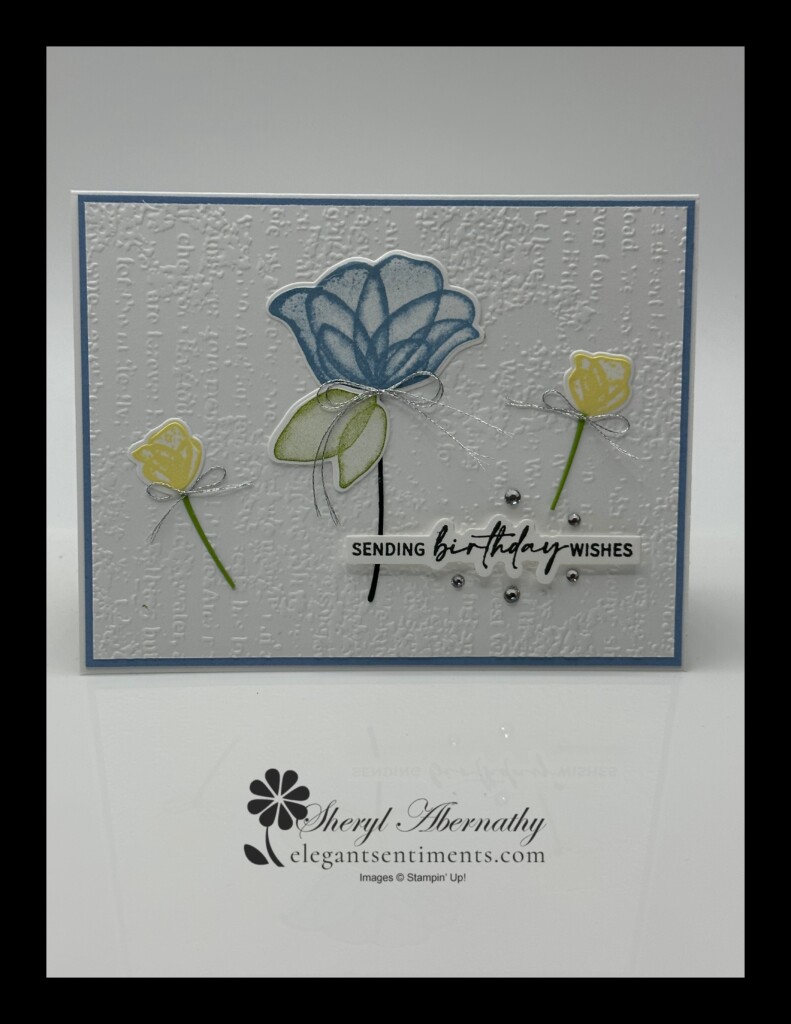
I really like the look of the flowers in this stamp set. The set is definitely aptly named.

Elegance Made Easy
Following are the quick steps to recreate this card.
First, make your cuts:
- Boho Blue card stock – 4 1/8″ x 5 3/8″
- Basic White card stock – 2 pieces 4″ x 5 1/4″ emboss one of the pieces using the Timeworn Type 3D embossing folder
- Die cuts:
- Use one of the larger flower dies to cut a Boho Blue stamped flower
- Use one of the small flower dies to cut two small Lemon Lolly stamped flowers
- Use the dual leaf die to cut a pair of Old Olive stamped leaves
- Use the stem die to cut a stem in Basic Black card stock and a stem in Granny Apple Green card stock. Cut the Granny Apple green card stock in half for use on the card front
- Punches
- None
Adhere the embossed Basic White panel to the Boho Blue card stock panel and then add to the front of an A2 card base made with Thick Basic White card stock. (Note: An A2 card base is made by cutting an 8 1/2″ x 11″ piece of Thick card stock in half on the long side. Score the 5 1/2″ by 8 1/2″ (half sheet) of card stock at 4 1/4 “.)
Arrange the die cut flowers, leaves and stems to the card front.
Add bows made of silver thread to each flower.
Place Dimensionals or cut Foam Adhesive Sheet to the back of a sentiment panel and add to the card front. I used a sentiment that I owb for this card. It is NOT part of the Translucent Florals stamp set and dies.
Adhere Rhinestone Basic Jewels around the sentiment.
For the inside stamp flowers from stamp set in the corners around a stamped or pre-printed sentiment.

To complete the project, stamp flowers on the envelope flap and front.

Finding Your Creative Elegance
In the end, the beauty of paper crafting lies in its ability to connect us with our own creativity and with others. It’s a chance to slow down, unplug, and create something beautiful and meaningful with our own two hands. So why not give it a try today? You never know where your creativity might take you.
If you would like to try your creativity with the products I used, you can shop with me anytime!


HAPPENING IN AUGUST
In Case You Missed It …….
Click on the image above to view the video of my latest You Tube Live. Check it out and if you would be so kind, please like, share and subscribe to my channel. I will be live every Thursday at 7:00pm EST. Thanks!
PAPER PUMPKIN

ABOUT THE KIT
Kit Name: With Love & Gratitude
This kit includes:
- 8 treat packages
- 8 note cards
- 8 coordinating envelopes
- 1 photopolymer stamp set
- 1 Lost Lagoon Ink S
- pot
- Specialty gold foil, precut embellishments
- Adhesives
- Finished treat packaging: 3-1/2″ x 5″ x 2″ (8.9 x 12.7 x 5.1 cm)
- Final card size: 3-1/2″ x 3-1/2″ (8.9 x 8.9 cm)
- Coordinating Stampin’ Up! colors: Copper Clay, Crumb Cake, gold foil, Lost Lagoon, Mossy Meadow, Pebbled Path


Introducing the latest addition to the Kits Collection by Stampin’ Up!
It’s time to craft with our latest kit: Festive Tags
’Tis the season to start your holiday crafting! It’s so simple with this all-inclusive kit. Adhere the die cuts and embellishments, then tie the tag to a gift with a twine bow. You’ll have handmade tags in minutes!


Live Graciously!
