Story of Elegance
It’s Friday! Yay!
I’m glad you’re here.
We have lots of fun new things happening this month, so you want to be sure to check out the bottom of my post today!
It’s been awhile since I focused on our punches, so today I decided that’s what I would do. Punches are fun and are a great tool to have in your crafting tool inventory. You can combine punches like I did in my card today and create something great in minutes.
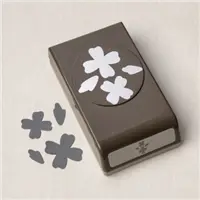
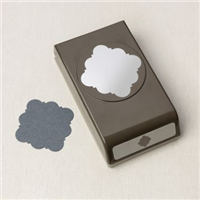
The punches I used for today’s card are the Flowers and Leaves Punch and the Handmade Tag Punch.
Here’s the card I made:

Flowers and Leaves with Handmade Tag
I used the Tasteful Textile embossing folder (retired) to add some texture to the paper before I punched the flowers.

A Closer Look
Elegance Made Easy
Following are the quick steps to recreate this card.
First, make your cuts:
- Very Vanilla card stock – 4 1/8″ x 5 3/8″ and 3 3/4″ x 5″
- Gold Foil – 4″ x 5 1/4″
- Pale Papaya card stock – 4″ x 5 1/4″ – embossed using the Tasteful Textile Embossing folder
- Old Olive card stock – 4″ x 5 1/4″
- Die cuts:
- None
- Punch:
- Flower and leaves punch to create 3 flowers using embossed Pale Papaya card stock and Old Olive card stock
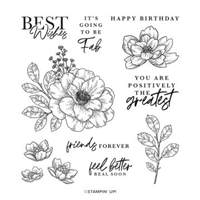
- Stamp sentiment using Old Olive ink onto a scrap of Very Vanilla card stock and punch using the Handmade Tag punch. I used a sentiment from the Cottage Rose stamp set
Layer the Gold Foil panel onto the largest Very Vanilla panel and add to an A2 card base made with Thick Very Vanilla card stock. Note: An A2 card base is made by scoring an 5 1/2″ x 8 1/2″ piece of card stock scored and folded at 5 1/4″.
Adhere the sentiment punch onto the card.
Assemble the leaves and arrange around the sentiment attaching with glue dots.
Add Gold Brushed Metallic Adhesive-Backed Dots (larger) to the centers of the flowers.
Finish by adding Gold Festive Pearls.
To complete the project, emboss the envelope flap.

You can shop with me anytime to create your own fantastic projects!


Every week in the month of September we’re offering a selection of discounted products. Discounts and product selection will vary from week to week. Check each week to see how you can SAVE $$!
PAPER PUMPKIN

Get your Halloween crafting on with the Spooky Treats Paper Pumpkin Kit. This month’s kit includes everything you need to make 18 absolutely adorable (and just the right amount of spooky) treat boxes—that’s 6 each of 3 unique designs! No need to let the season creep up on you; subscribe and order your kit today. The last day to order is September 10th!

Hurry and get these fabulous bundles while supplies last, September 1 – 30 only.


Live Graciously!
