Story of Elegance
Happy Thursday!
Thank you for stopping by.
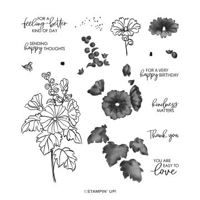
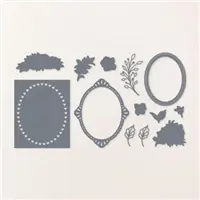
Today I am stamping with one of the lovely stamps sets that you can get FREE with purchase during Sale-A-Bration called Beautifully Happy. It’s such a beautiful stamp set and one that you definitely want to include in your collection. Be sure to grab this set soon because it’s only available while supplies last or until February 28th , whichever comes first. Of course, I couldn’t quite let go of the Framed Florets so I added one of the dies from the Framed Florets die set to complete the project.
Here’s the card I made:

Beautifully Happy – Thank You
One of the things I did was stamp my flower onto the die cut panel with the hearts going in the opposite direction. At first I was going to re-do the card, but the more I looked at it, the more I liked it, so I kept it that way. Sometimes mistakes work out just fine.
I really like the texture and dimension on this card. I used the retired Tasteful Textile 3D embossing folder. (I will keep this one in my stash for ever because I use it a lot.) The stamped images themselves add lots of visual texture too.

A Closer Look
For the inside, I stamped a flower to coordinate with the card front.

Elegance Made Easy
Following are the quick steps to recreate this card.
First, make your cuts:
- Basic White card stock – 4 1/8″ x 5 3/8″ Dry emboss with your favorite embossing folder. I used Tasteful Textile.
- Basic White card stock – 3 1/2″ x 4 3/4″ Die cut using the Framed Floret die
- Gorgeous Grape card stock – cut just under 3 1/2 ” x 4 3/4″
- Die cuts:
- as noted above
Add embossed Basic White panel to an A2 card base made with Thick Basic White card stock. Note: An A2 card base is made by scoring a 5 1/2″ x 8 1/2″ piece of card stock scored and folded at 4 1/4″.
Stamp the flower onto the die cut panel in the direction that you want the hearts to show. I used Basic Gray for the first stamp, Highland Heather for the floral stamp and Old Olive for the leaves. I used a second floral stamp on the larger flower in Gorgeous Grape to add additional tones. I brushed around the flower edges with a Highland Heather blend.
Adhere the Gorgeous Grape panel to the back of stamped die cut panel. Place glue in the corners and center only to ensure glue doesn’t seep through the hearts.
Put the combined panel onto the card front using Foam Adhesive Sheet cut to fit.
Stamp the sentiment using Gorgeous Grape ink, trim to fit and add to the card front.
Add a bow the made with white craft store ribbon (colored using a Gorgeous Grape marker) to the base of the flower and a Pearl Basic Jewel to the flower center.
To complete the project, stamp a flower on the envelope front and flap to coordinate with the card front.

You can shop with me anytime to create your own fantastic projects!


HAPPENING IN JANUARY
PAPER PUMPKIN


Thank You is always appropropriate. Show of your style with our newest kit – Saying Thanks


Live Graciously!

Another lovely creation! Thank you.