Story of Elegance
Hello and welcome!
Well first things first! The End of Year Clearance begins today. This fantastic sale has savings of 30%-50% on select items in the August-December 2020 Mini Catalog! Woo hoo! The sale runs December 8, 2020 through January 4, 2021. But don’t delay, sale items are available only while supplies last.
SHOP NOW
And WAIT, there’s more!! The Clearance Rack is updated! Hop on over there to pick out a few of your favs at great savings.
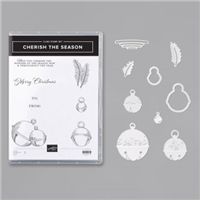
SAVE BIG NOWOK – Now let’s handle the rest of the post. Today I’m crafting with the Cherish the Season bundle. When I picked up this bundle I was impressed by it’s simplicity. The first thought I had when I looked at these products was Silver Bells, so that’s what I went with.
This is a great set to showcase our beautiful Designer Series Paper so I grabbed a couple of sheets from the beautiful Feels Like Frost DSP set. I just love these papers and the Silver foiling options worked perfectly as a backdrop for my bells.

Cherish The Season Silver Bells
Die cutting with Silver foil makes quick work of this card. I like silver foil, but I’m also clumsy. I dropped my scissors on my completed card and added some “character” to the top of the larger bell. Ha! Ha! Ha!

A closer look at the bells
Here’s are steps to create this card:
1: Cut a 4 1/8″ x 5 3/8″ panel of Real Red card stock and adhere to a card base of Thick Whisper White card stock.
2. Add a 4″ x 5 1/4″ panel of Feels Like Frost DSP to the Real Red panel.
3: Cut a 3″ x 3″ square of Feels Like Frost DSP and angle atop the larger DSP panel.
4. Use the Textured Textile 3D embossing folder to emboss a 3″ x3″ square of Real Red card stock and angle atop the smaller DSP panel.
5. Die cut the bells in Silver foil and the evergreen sprigs in Shaded Spruce card stock. Use glue to connect the bells and adhere the sprigs to the back of the bells. Add silver wire to the back of the bells between the evergreen sprigs.
6. Create the sentiment panel by stamping the sentiment in Real Red ink on a 1/2″ x 3″ strip of Whisper White card stock. Cut the end with the Banner Pick A Punch. Use the punch to cut the end of a 3/4″ x 3 1/4″ strip of Silver Foil. Glue the stamped sentiment to the foil and the combined piece to the card.
7. Adhere the bell assembly to the card using Dimensionals . Add a bow of Silver Edged Metallic Ribbon and Clear Basic Rhinestones.
8. For the inside of the card: Stamp the sentiment is the center with Real Red ink. Add a die cut bell and color the holly with Shaded Spruce and Real Red markers.

A look inside

Finish the project by adding coordinating DSP to the envelope flap. Beautiful!
Find Your Elegance
You can get your creativity going anytime. Shop with me whenever you choose. You can click any item to get to my store. Easy Peasy!
Here are the items I used for today’s card:

Price: $15.00


I hope that you have a safe and happy week. I’ll be back with another card to share. I hope you’ll stop by too! Until then,
Live Graciously!
