
Story of Elegance
Welcome to InKing Royalty’s January 2023 Blog Hop!
If your craft projects aren’t already filled with hearts, then you might be behind the eight ball. No worries – we are here to help. We are excited to share our heart-filled creations with you and hope you love them! After you read my post, I hope you’ll hop over to the next person on the list at the base of this post.
I enjoy using Stampin’ Up paper punches and when I learned of today’s theme, I knew right away that I wanted to use the Heart Punch Pack. This wonderful punch set has two punches, the Scalloped Heart punch and the Heart punch which are perfect for layering.
I combined the punches with one of my favorite die sets, Scalloped Contours and the new Cane Weave 3D embossing folder for a quick and elegant card.
Here’s the card I made:

InKing Royalty Blog Hop – Hearts
There is so much texture on this card and I love that.

A Closer Look
Elegance Made Easy
Following are the quick steps to recreate this card.
First, make your cuts:
- Punch a heart using Very Vanilla card stock
- Punch a scalloped heart using Pale Papaya card stock
- Die cuts:
- Use the large die from the Scalloped Contours cut the scalloped panel using Pale Papaya card stock
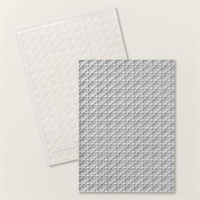
- Use the next largest die from the set to cut a panel using Very Vanilla card stock. Emboss the panel using the Cane Weave 3D embossing folder.
Emboss the card front of an A2 card base made with Thick Very Vanilla card stock. Note: An A2 card base is made by scoring an 5 1/2″ x 8 1/2″ piece of card stock scored and folded at 4 1/4″.
Layer the die cuts onto the embossed card front as shown.
Stamp the sentiment onto the Very Vanila heart using Pale Papaya ink. I used a sentiment from the Celebrating You stamp set. Layer the hearts using Foam Adhesive Sheet cut to fit just inside the heart. Add the assembled heart to the card front.
Add Pale Papaya gems from the 2121-2023 In Color Opal Rounds around the heart and a bow made with your favorite coordinating ribbon.
To complete the project, emboss the envelope flap using the Cane Weave 3D embossing folder.

Thank you for stopping by today. I hope you’ll hop along to the next stop on the blog hop,
There’s lots of inspiration to be found in this group – and you don’t want to miss it!
Thank you for hopping along with us. If you get stuck during the Blog Hop, please use this line-up as a guide:
You can shop with me anytime to create your own fantastic projects!


HAPPENING IN JANUARY
PAPER PUMPKIN


Thank You is always appropropriate. Show of your style with our newest kit – Saying Thanks


Live Graciously!

Love this beautiful and elegant card! Your detailed layers are wonderful and add to the beauty. Anyone would be thrilled to receive this one!
Thank you Jackie. I made it for a family member – I hope she’ll like it.
This card is simply elegant! Love the texture and layers. Enjoy your day!
Thanjk you Hilda! I hope you have a lovely day as well!
Very pretty! I wouldn’t have put these two colors together for a hearts card, but you did it wonderfully! So elegant! Very impressive!
Sheryl, I love this elegant card and the texture works well. I can’t wait until my embossing folder arrives. Thanks for sharing.
Thanks Renae! I’m loving this folder. I find I’m using it more than I thought I would. I hope you enjoy yours too!
I just got this embossing folder and would not have imagined how elegant it could look. This card is stunning. I may have to CASE it, lol.
Awww, Thanks Jan! Enjoy your day!
Thanks Sue!
Your opening comments say it all, Sheryl! This card is SOOOO elegant! I love the colors, the beautiful texture and the layout of your sweet, sweet card. So glad you hopped with us today. ♥
Beautiful ! I love the texture that you added because it makes it so regal looking !
Thank you! I’m glad that you like it and I really appreciate the feedback. Have a great day!