Story of Elegance
Wow!
I’ve been out of my craft room since mid-February and boy am I happy to be back! I’ve sorely missed being able to share my projects with you. Thanks to everyone for all your kind thoughts and well wishes as I recovered from my surgery. You’re the best!!
It’s an exciting time to be back too – just in time to take advantage of our Last Chance Sale! Starting today, you can enjoy significant discounts on products from our 2022-2023 Annual Catalog and our January – April 2023 Mini Catalog. This sale runs through midnight May 1 while supplies last.

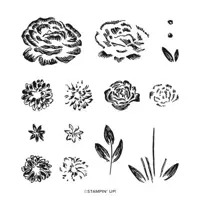
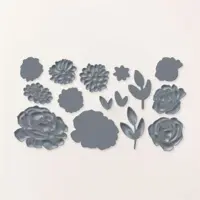
To celebrate, I made a card using the Brushed Bouquet Bundle. This fantastic bundle is available at a phenomenal price if you order them separately during the Last Chance Sale, but don’t hesitate – at these prices – they won’t last!
Here’s the card I made:

The pretty floral framed was made using is one of three textures in the new Basics 3D embossing folder set that are available as an online only exclusive product.

A Closer Look
For the inside, I added a pretty flower to match the card front.

Elegance Made Easy
Following are the quick steps to recreate this card.
First, make your cuts:
- Gorgeous Grape card stock – 4 1/8″ x 5 3/8″
- Basic White card stock – 4″ x 5 1/4″ and embossed with the Basics 3D embossing folder.
- Die cuts:
- Use the largest square of the Stylish Shapes die set to cut a square in the embossed panel
- Use the second largest square of the Stylish Shapes die set to cut a square of Basic White card stock
- Punches: none
Adhere the Gorgeous Grape panel to the front of an A2 card base made with Thick Basic White card stock. Note: An A2 card base is made by scoring a 5 1/2″ x 8 1/2″ piece of card stock scored and folded at 4 1/4″.
Add the embossed and die cut panel to the front of the Gorgeous Grape panel using Foam Adhesive Sheets.
Stamp the large flower onto the die cut Basic White square and adhere to the center of the opening on the card front.
Stamp the sentiment onto a piece of Basic White card stock using Gorgeous Grape ink and die cut, then stamp three small flowers and die cut. Add the sentiment and flowers to the card front as shown.
To complete add three Iridescent Basic Pearls to the center of the small flowers.

You can shop with me anytime to create your own fantastic projects!


HAPPENING IN APRIL
PAPER PUMPKIN


Our Mini Catalog will be leaving soon. Be sure to shop the Last Chance sale to get your favorites before they’re gone!


Live Graciously!
